Solidity Interview Challenge — Breakdown

You can use this link to know more about me, check my projects, or contact me for work:
I am a self-taught developer or at least that is what I have been saying in interviews or when friends ask me about my profession, but the reality is that all that I know comes from other professionals and communities willing to share their knowledge so others can learn something instead of expending hours trying to figure out something.
Is with this feeling of helping others to succeed that I created this tutorial about a real-life scenario because there are a lot of tutorials about how to create an erc721 (NFT) and so on, but let’s break down this coding challenge that one member of a discord solidity learning community shared me.
As devs, we need to prove what we can do outside the green code (tutorials) so we can demonstrate our solving problem skills, but we must consider as well that other things are being evaluated as well: how readable is our code, how secure is our code, how efficient, and so on.
As solidity devs, our biggest concern must be security, gas optimization, unit testing, and how readable and “audit friendly” are our smart contracts. The last two are not mentioned as much as how they should. I was part of the solidity expert BootCamp from encode club and extropy.io that where I learned how important is to use NatSpec and to create documentation of our contract.
First, great DAOs and blockchain companies are open sources. They have their contracts verified, audited, and have a GitHub profile with the code. This is the case of Uniswap, AAVE, Compound, and Yearn Finance. This means that others can check, audit, fork, and read the code therefore is important for them to have a readable, commented, and well-documented code. And for an auditor is much easier to work with a code with these features. And as a developer will make it easier to have a big picture of your contract.
Let’s see the instructions for this challenge:
- Create an ERC20 Token with 1,000,000,000 supply and an NFT ERC721 Token with Token URI (compatible with OpenSea standard).
- Create a minting HTML page where the user can connect with Metamask, and mint a random monster (of these five available monsters) with a random power level between 1 and 100. The cost for minting a monster is 15 of the token.
- The page should list all of the prior minted monster images and the power level of the connected user wallet.
- The contracts should be deployed to Mumbai Testnet and use the ChainLink VRF for a secure random generation.
In this post I will be explaining the smart contract step by step, let me know in the comments if you would like a second part with the web3 minting site created with react js.
This is the repo for the smart contract:
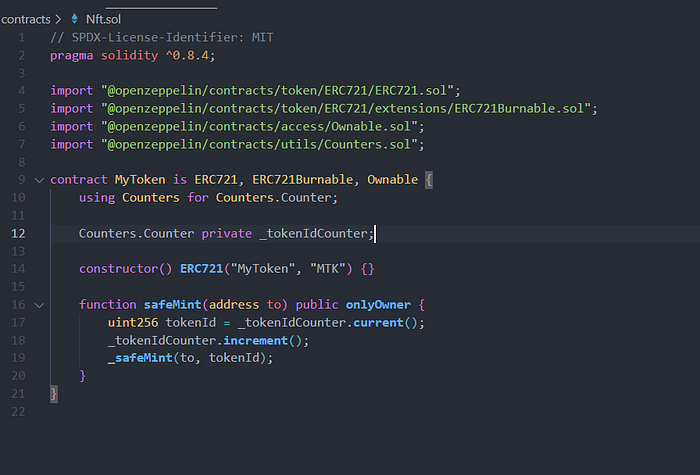
First, we create a basic token:

Then the NFT contract:
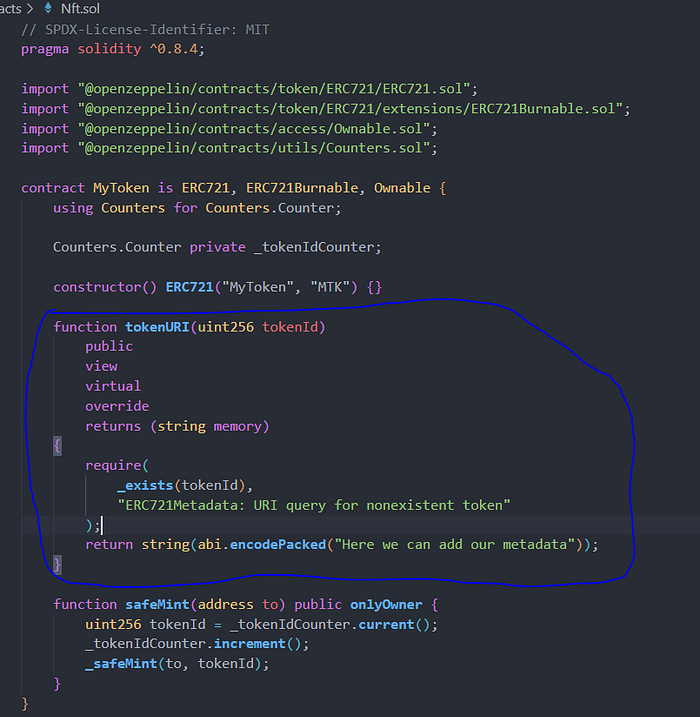
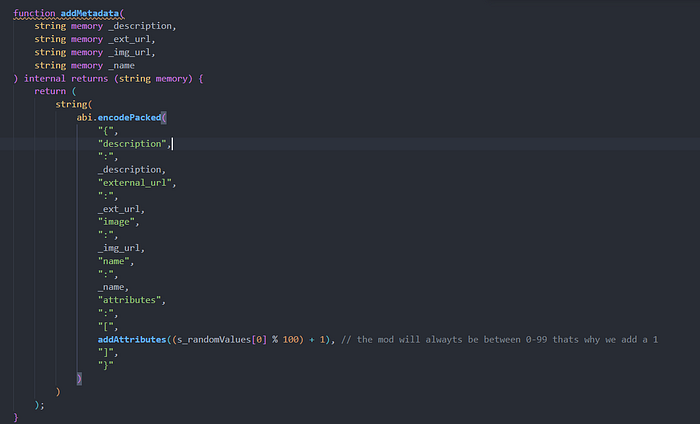
We need to modify how the NFT token handles the URI so we can have on-chain metadata.
We take the token URI function and now we only need to add our custom metadata.
For this, we must use the Opensea metadata standard since it is the most used for NFT marketplaces. If we don’t follow this, our NFT won’t have an image, attributes, and so on on the marketplace.
This is the link to the metadata standard with some examples

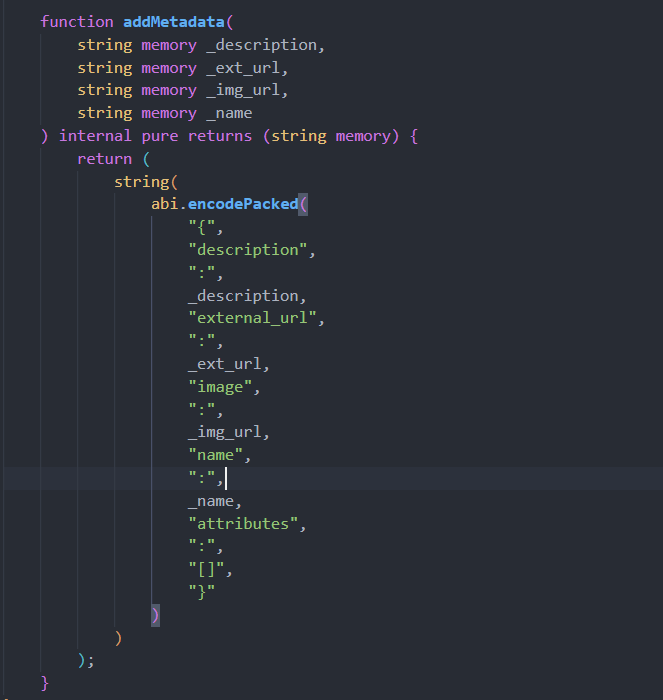
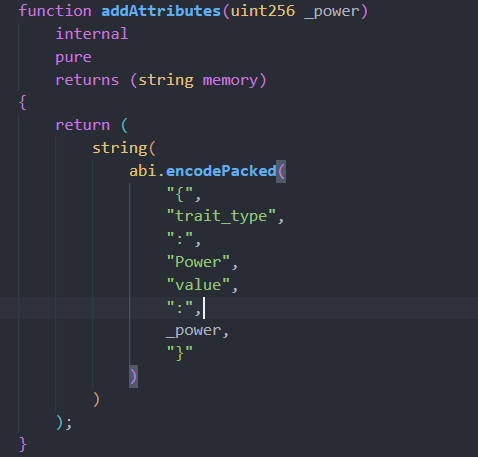
This function will return a string with the metadata structure that we are looking for.
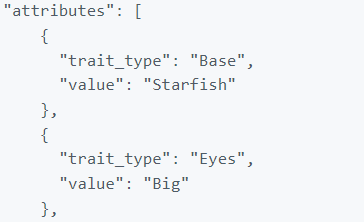
Now let’s do the same for the attributes:
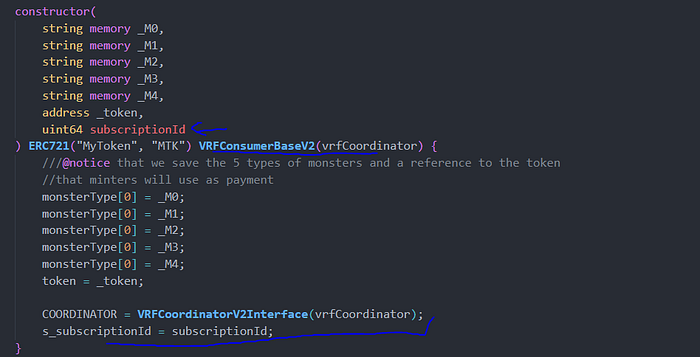
Also, let’s add a mapping to track the 5 types of images and a reference to the token:
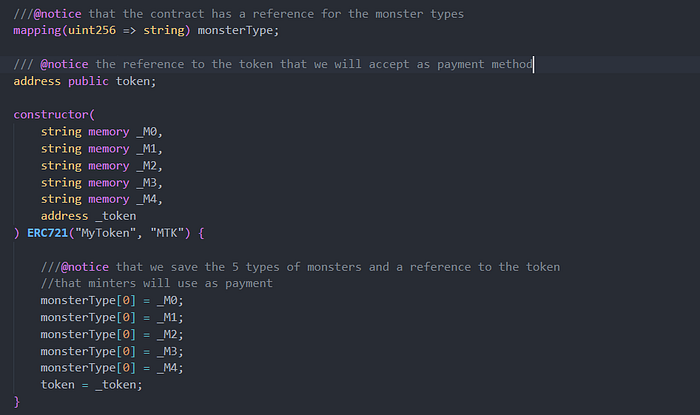
As you can see I added comments with nat_spec, which is a must for a professional smart contract.
Now let’s add a mapping for the metadata:

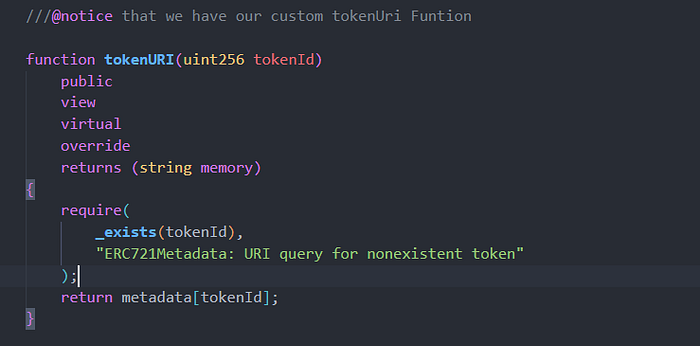
And let’s add it to our tokenURI function
Later on, we will add the metadata on the minting function of the NFT.
So, our next step will be modifying our contract so it can be Chainlink VRF compatible.
First, we import the libraries:

Second, we make our contract VRFConsumerBaseV2:

Third, we add some state vars:
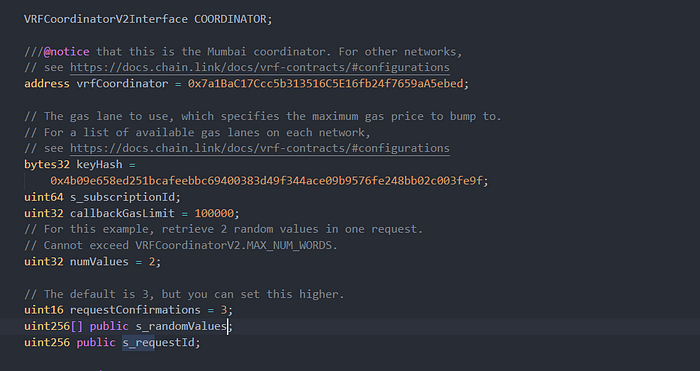
Fourth, we assign values to the constructor:
Finally, we add the proper functions:
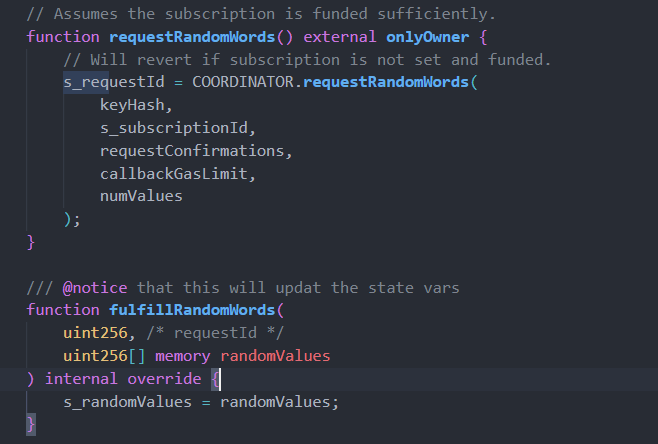
Now our contract will update the s_randomValues when we call the requestRandomWords.
Let’s make the safeMint interact with these random values.

Now we have random metadata generated with Chainlink VRF.
Now the only pending task will be made that anyone can mint the token using the ERC20 token as payment, with a fixed value of 15.
We can import the ERC20 contract or the interface IERC20 from Open Zeppelin.

Then, we add a condition that triggers a transfer form, which requires the user to approve the contract with 15 units of the token.

Two lines of codes, sweet.
The last part will be adding a function to withdraw these tokens from the contract.

And that’s how we resolve these common interview challenges. If you have any questions or want some advice for your project you can reach me on LinkedIn or leave me a comment I will be more than glad to help you. Please comment if you want part two with the integration with a frontend. Follow me for more contracts!

